
Every couple of years, the foodie world is taken by storm by some craze or another. It has been cupcakes, then macaroons & even cronuts. Cake Pops also had a moment & rightfully so because these yummy little surprises are delicious with a capital D. I am secretly hoping that it will become a thing again soon. It has certainly become super popular in our house over the last couple of weeks.
It all started one morning when I woke up with the idea of making a rainbow cake. Not sure why, but I just had to. I found this recipe & started baking. Sadly (due to operator error probably), the sponge cakes broke when I tried to remove them from the tins. Ugg. My excitement was gone!! I wanted to make an awesome Instagram worthy cake & instead I was stuck with crumbs & broken cake.
I honestly did not want to waste all the cake & the ingredients. Then the light bulb moment: I can use the sponge cake to make Cake Pops! Aha. Clever me, right?
The recipe basically has three phases being (1) baking the sponge cake, (2) making the icing & (3) assembling the pops. It takes quite a bit of time, so plan the entire process beforehand so that you don’t get caught off guard. I’ve added a number of tips in the method part of the recipe, so please read through the entire recipe before starting. Happy pop makin’!
Fun & Festive Cake Pops
Makes about 40 pops (including a few testers of flops for eating in between)
For The Sponge Cake (adapted from this recipe)
225g Unsalted Butter, at room temperature
225g Castor Sugar
1 tsp (5ml) Vanilla Extract
4 Large Eggs, at room temperature
225g Self-Raising Flour, sifted
Food Colouring – I used pink, green & blue, but feel free to use whatever you love
For The Butter Cream
250 g Unsalted Butter, at room temperature
439 g Icing Sugar, sifted
2 t of Vanilla Extract
Food Colouring – I used pink, green & blue, but feel free to use whatever you love
For Decorating
450g Cadbury’s Dairy Milk Chocolate
Sprinkles of Your Choice
20x paper straws (cut in half to make 40) or 40x Lollipop sticks (available from baking or hobby stores or order online from here)
Gold Shimmer Edible Metallic Dust (from Nicoletta), optional
Method
- Preheat the oven to 180°C.
- Lightly grease 3 x 20cm round cake tins & set aside. Cream the softened butter & sugar together using an electric beater until it turns pale.
- Add your eggs, one at a time, making sure you beat in each one before you add the next. Add the vanilla extract. Fold in the sifted flour.
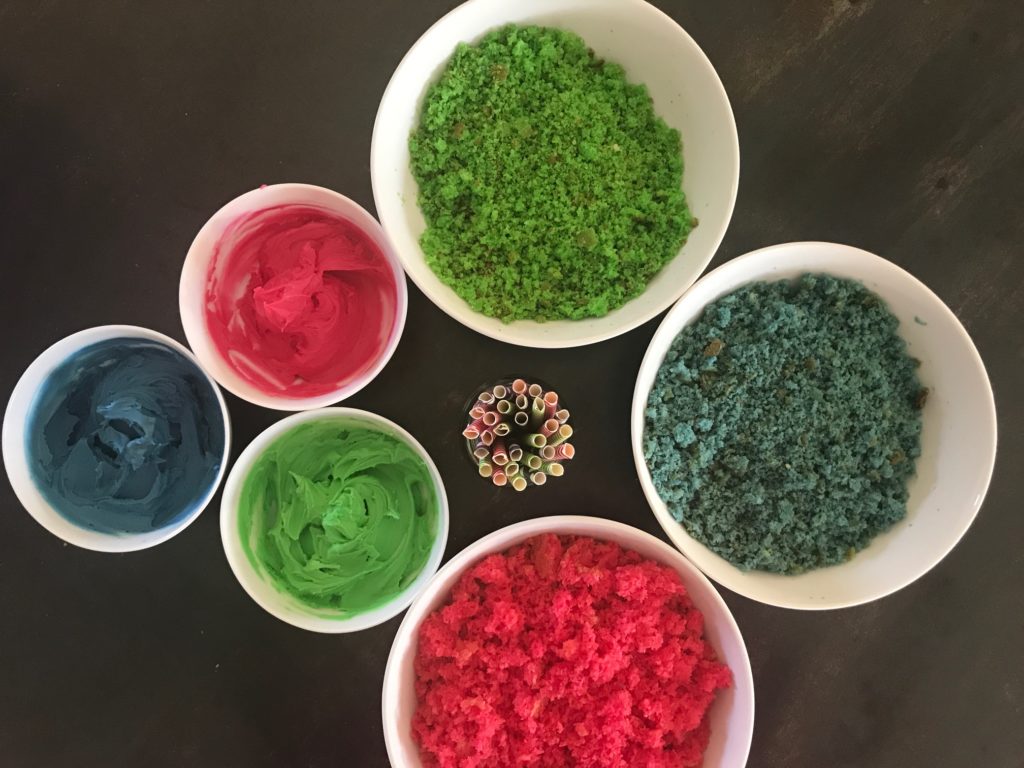
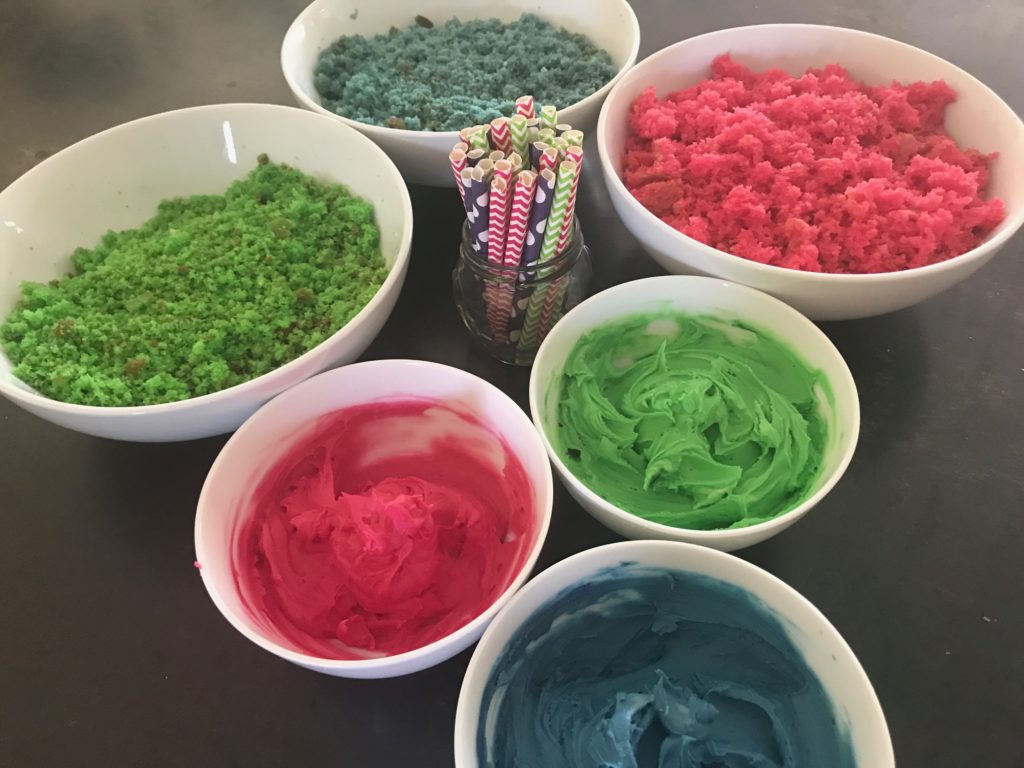
- Divide the mixture into three mixing bowls making sure that the weight of all three mixtures is equal. Now colour each batch with a different colour. Be careful not to add too much food colouring to each batch of batter in the beginning. You can always add more colouring later to achieve a brighter coloured cake.
Tip: if you prefer plain vanilla sponge cake, then feel free to leave step 4 out completely.
- Pour each batter into the three prepared pans & place into the oven for about 15–20 minutes or until a toothpick or skewer inserted into the centre comes out clean.
- Remove cakes from the oven & allow to cool for a couple of minutes in the pans before gently taking them out & carefully placing them on a cooling rack to cool completely.
Make Your Butter Cream Icing
- Cream your butter until pale, then sift in the icing sugar. Add the vanilla. If the buttercream is too thick then add literally only a teaspoon of boiled water at a time to soften.
- Divide the buttercream into three bowls & add a few drops of food colouring to each colour (use the same colours that you used for the three sponge cakes).
Tip: As with the cakes, you can leave the colouring out, however I find that the three different colour insides add some fun & an element of surprise!
Assembling Your Pops
- Using your fingers, break up the sponge cake into fine crumbs. Now, mix each sponge cake colour with your mixed buttercream icing. I recommend using your hands because it gives you an idea if the cake / butter cream ratio is correct.
Tip: Add only small batches of buttercream to your cake crumbs at a time. Too much buttercream can make your pops a bit chewy. This is your own preference, but don’t feel that you have to add all the buttercream if you don’t want to.
- If you are using straws (& not popsicle sticks), then cut the straws in half first.
Tip: do not to attempt to use plastic straws. Not only are they super bad for the environment, but they are also not sturdy enough to hold your pops.
- Line a baking tray with baking paper. Start by making the little balls. I do this with my free hand, however, you can use a small ice cream scoop for this to keep the ball size consistent. I prefer to keep the pops between the size of a squash ball, but you can make it bigger.
- Place them all on the baking tray & pop in the fridge for about 15 minutes. In the meantime, you need to break up the chocolate & pop it in the microwave for 30 seconds. Remove & stir. Repeat as many times as it takes to melt the chocolate, but without burning the chocolate.
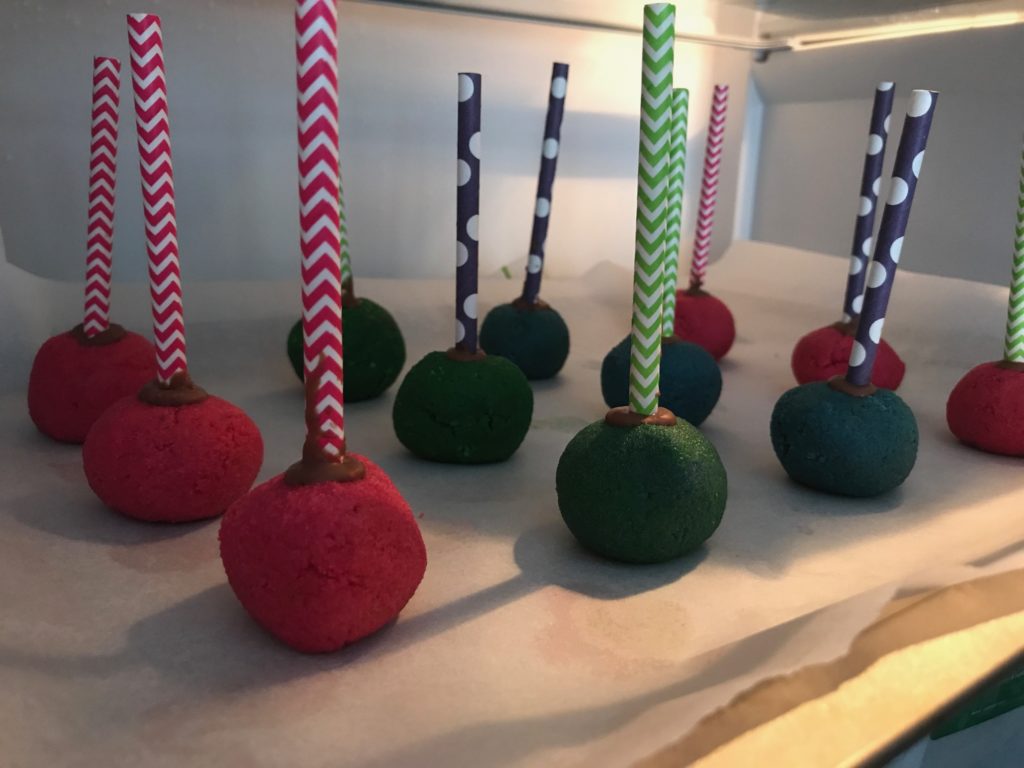
- Remove the balls from the fridge, now dip a little bit of the chocolate on the end of the straw or cake pop stick. Gently push a lollipop stick or straw into each cake ball taking care not to let it break. You now want the sticks to dry & set for a while, so if it is very hot place them in the fridge for about 15 minutes.
Tip: It is a good idea to use a piece of polystyrene that you have around to put these in whilst they dry. I use a round piece of polystyrene that is also suitable for displaying them. I got mine from a craft or baking store – I found mine at Her-Annies in Centurion).
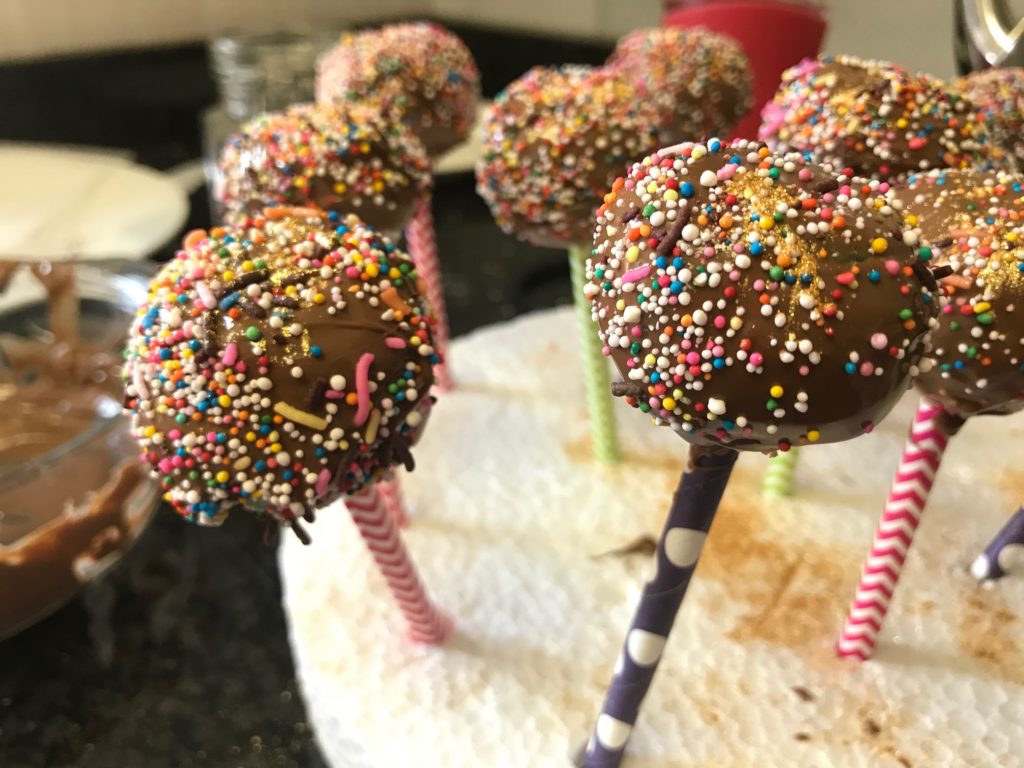
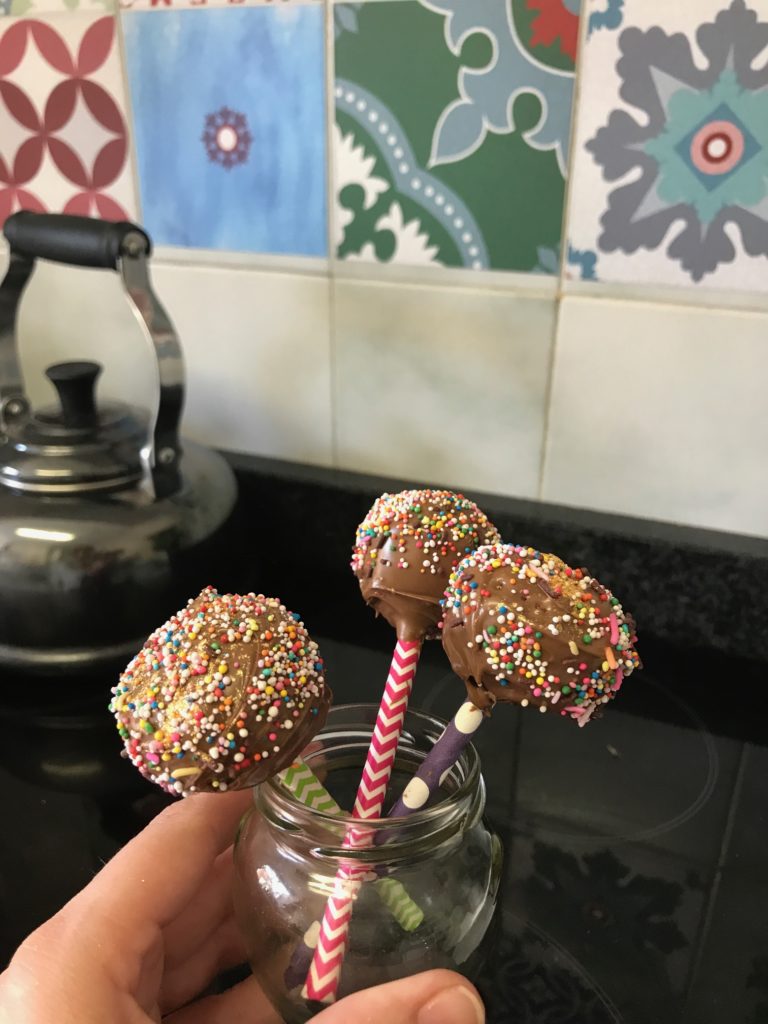
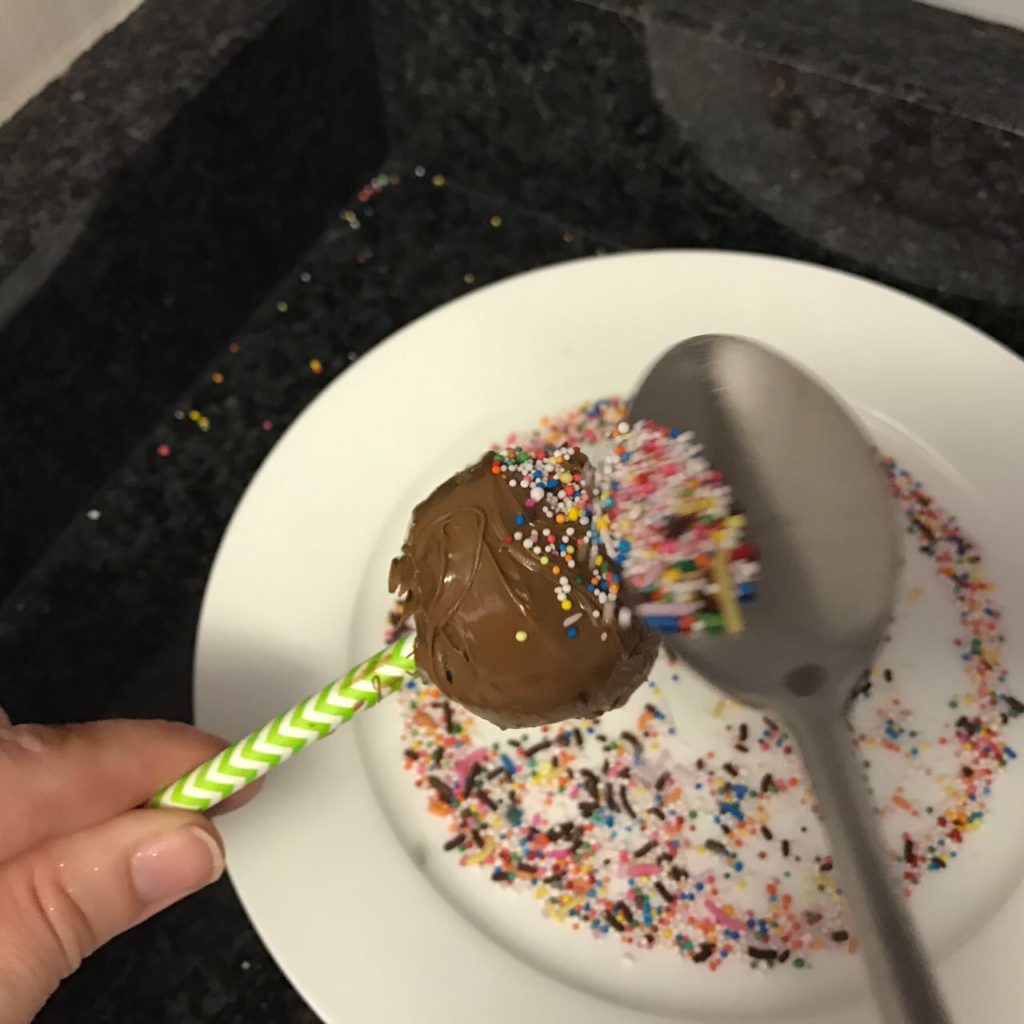
- Now coat each cake pop with melted chocolate. I use a teaspoon for this. Sprinkle with decorations of your choice (sprinkles, edible glitter). Do this while the chocolate coating is still wet to ensure that they stick well.
Tip: Allow the cake pops to dry neatly by standing them upright with the sticks in a piece of polystyrene. You can also get a Cake Pops Holder if you can find one (I saw one at Bakers’ Bin in Centurion, but haven’t managed to find one for sale online).
- Eat one or two or three & watch the faces of those around you as they bite into these yummy treats!
These are a massive hit. They might be lots of work & quite fiddly to make, but they are fun & oh so delicious.
Can’t wait to pop one in my mouth again soon!
Yolandi ♥
When life gives you cake crumbs….make cake pops! lol. love it!
This is sooo awesome! I love that. Thanx for reading. x