
A while ago I wanted to make marbled sugar cookies with embossed letters. Luckily my friend Karen from Lovilee had a set of letter stencils. And so we got together for a morning of seriously exciting marbled-biscuit-making! I find that baking & decorating is double the fun when doing it with a friend.
If you feel overwhelmed by the entire process, then I suggest that you bake your biscuits a few hours or even a day before you want to add the marbled fondant on them.
Before we start, here are some things about fondant that I want to share:
- Fondant is also known as soft icing, plastic icing, sugar paste or ready to roll icing.
- Fondant icing is actually really easy to colour, shape & work with. And if you make a mistake you can quickly roll it out again.
- If you have leftover fondant, wrap it tightly in cling wrap, seal & place in the fridge. This way it won’t dry out. It should last you weeks.
- If you roll out your fondant, make sure you move the fondant or ‘flip’ it around often so that it doesn’t stick to the surface.
- Water is only used to stick fondant together, but be sure to keep water away from your fondant when rolling it.
Marbled Sugar Cookies with Stenciled Letters
Makes 44 biscuits
Ingredients:
For the Vanilla Snap Biscuits*
185g unsalted butter, chopped
1 cup (220g) caster sugar
1 ½ teaspoons vanilla extract
2 ½ (375g) plain cake flour
1 egg
1 egg yolk, extra
For the Fondant Icing
white fondant
1 or 2 gel food colours (I used black here)
tooth pics
rolling pin
cookie cutters
stencil letter (if using)
a bit of tap water
edible gold leaf
Directions to bake biscuits:
- Place the butter, sugar & vanilla in a food processor & process until smooth.
- Add the flour, egg & extra egg yolk & process until a smooth dough forms.
- Turn the dough out onto a lightly floured surface & divide in half.
- Roll each piece out between sheets of non-stick baking paper until 5mm thick.
- Refrigerate for 10 minutes or until firm.
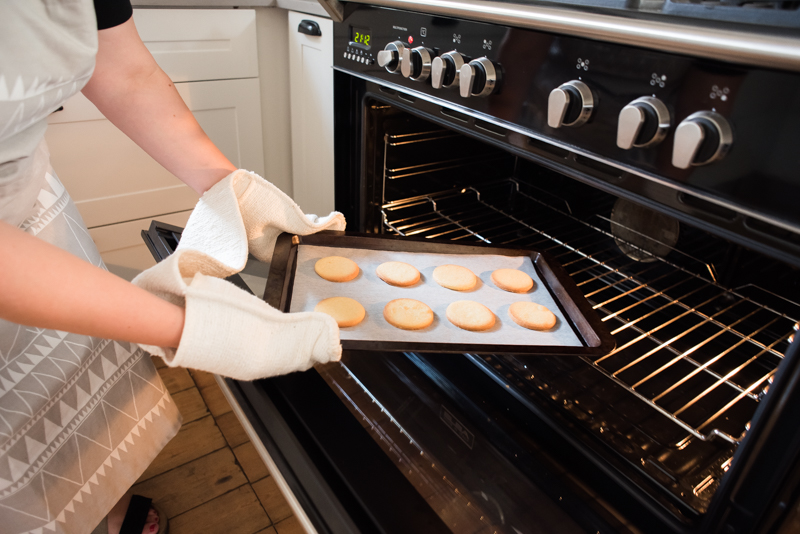
- Preheat the oven to 160°C.
- Remove the top sheets of baking paper from the dough. Using a 6cm round cookie cutter, cut shapes from the dough, re-rolling as necessary.
- Place the round on lightly greased baking trays lined with non-stick baking paper & bake for 12-14 minutes or until golden.
- Allow your biscuits to cool on trays for 10 minutes before transferring onto wire racks to cool.
Directions for the Fondant Marbling:
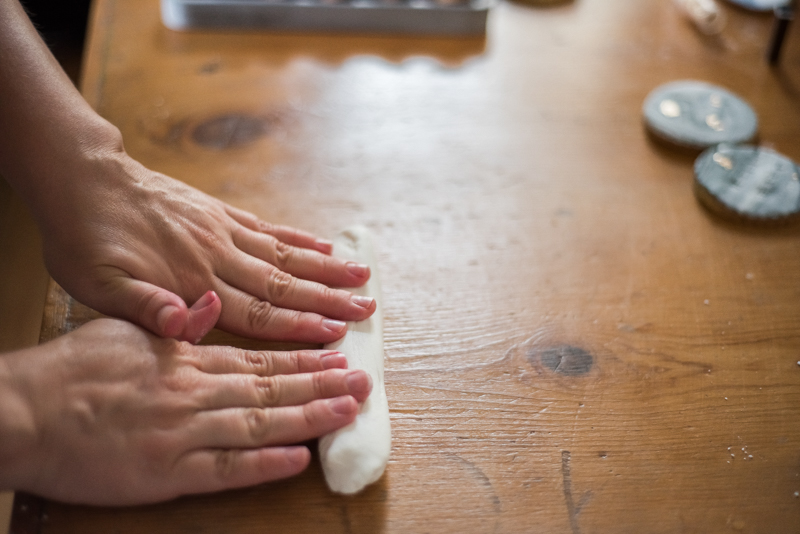
Start by kneading your white fondant until it is pliable. Then roll it into a sausage.
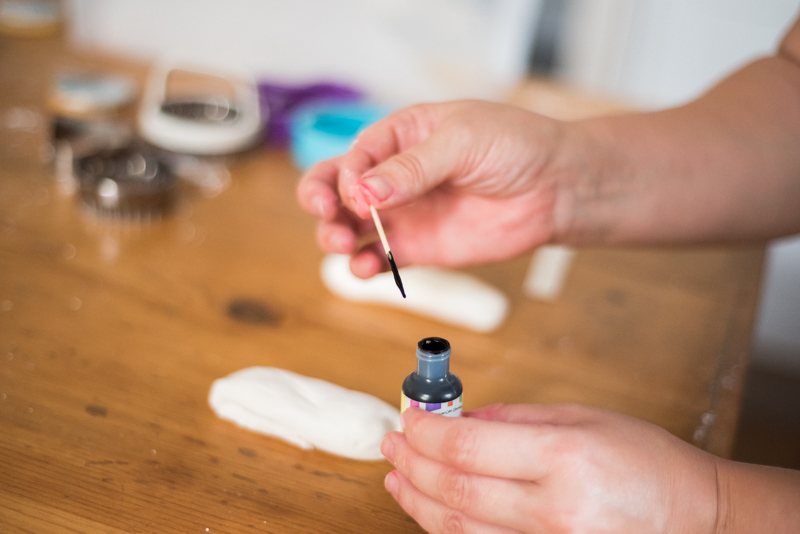
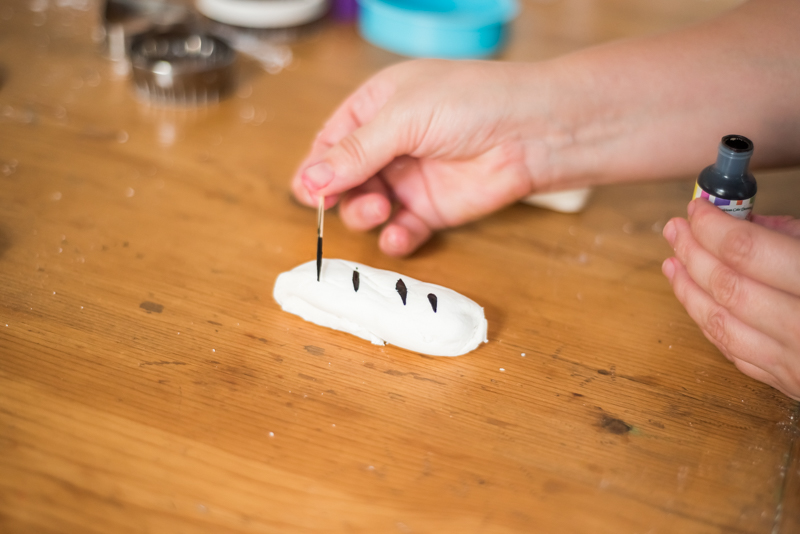
Use a toothpick to add dots of colouring on the fondant. This ensures that you don’t add too much colouring at once.
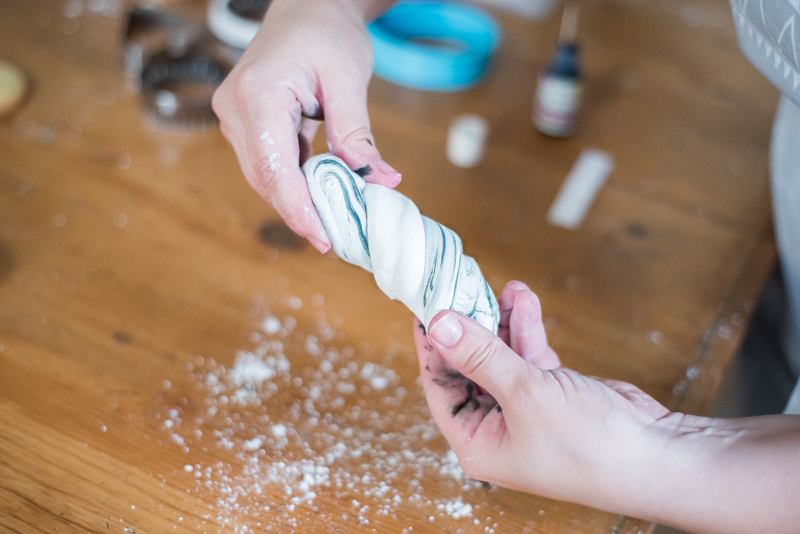
Now twist & fold the fondant until the colour starts to streak. The more you knead the icing, the less obvious the marbling will be, so don’t overwork it.
Dust your rolling pin & your surface with a bit of icing sugar. Roll out your fondant until you have achieved the right kind of marbling effect.
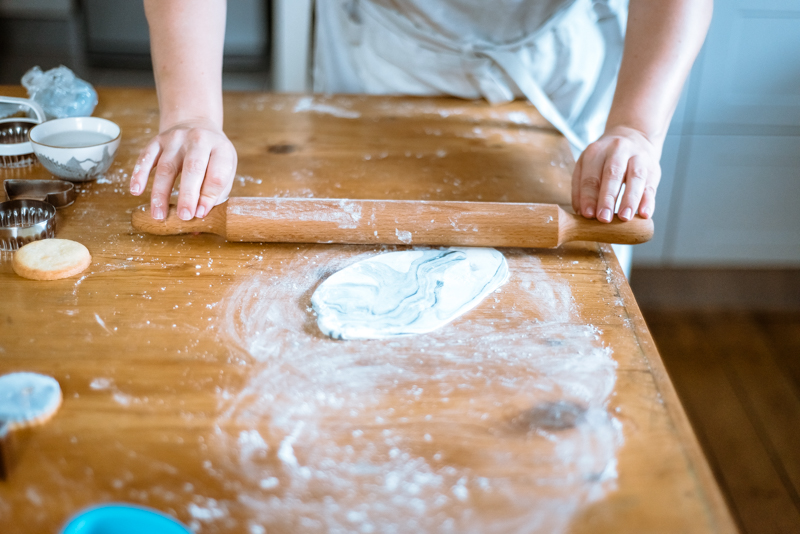
Flip over the fondant to make sure it doesn’t stick to the surface.
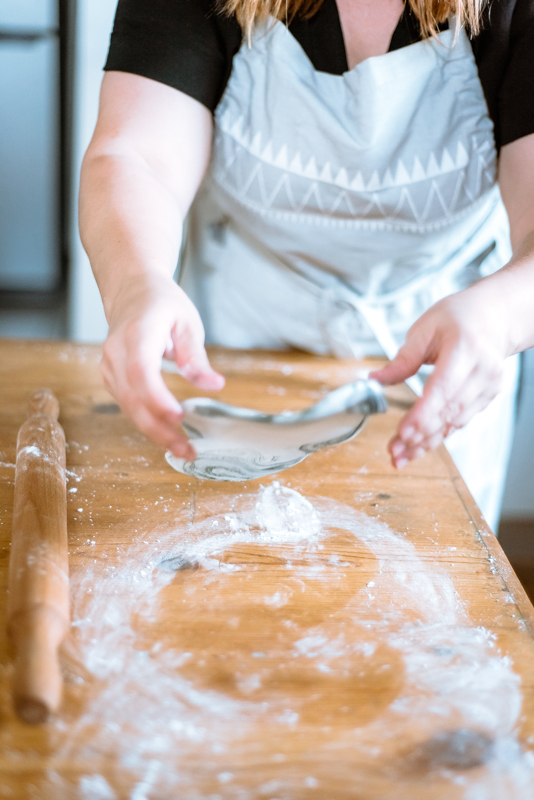
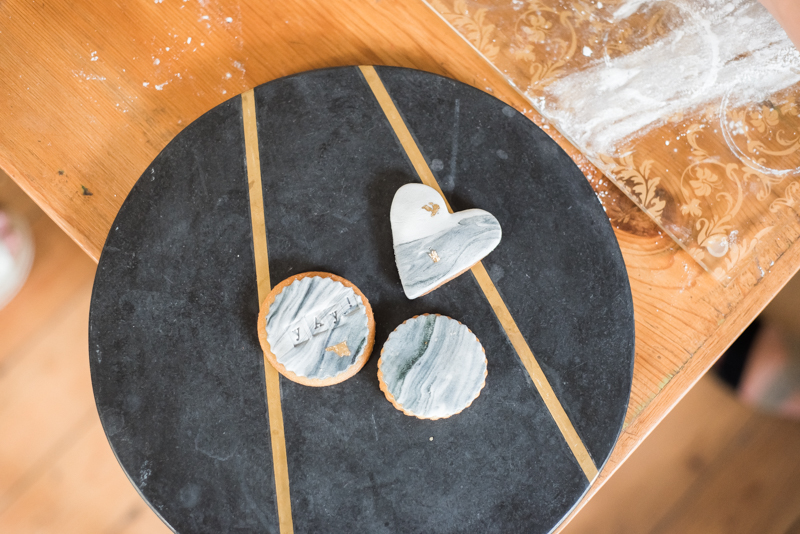
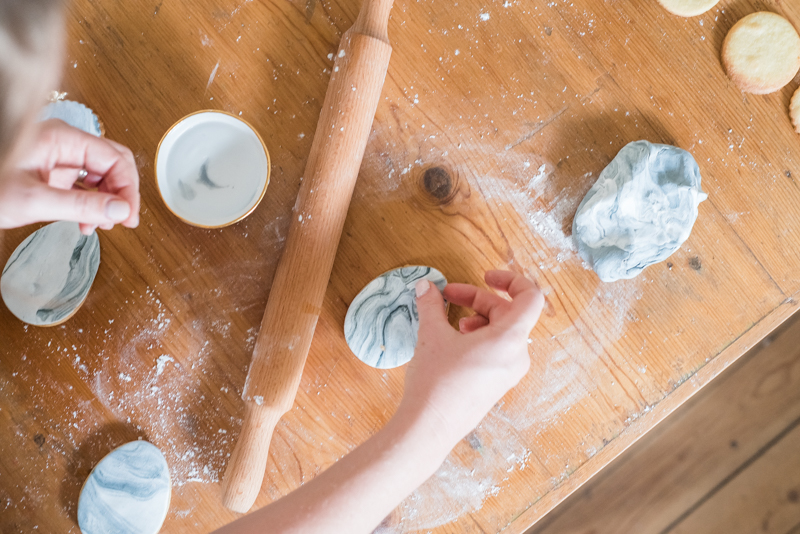
Cut out the fondant in the same shape as your biscuits. Use your finger to ‘paint’ a tiny bit of water on the entire back of your fondant, then gently press the fondant onto the biscuits.

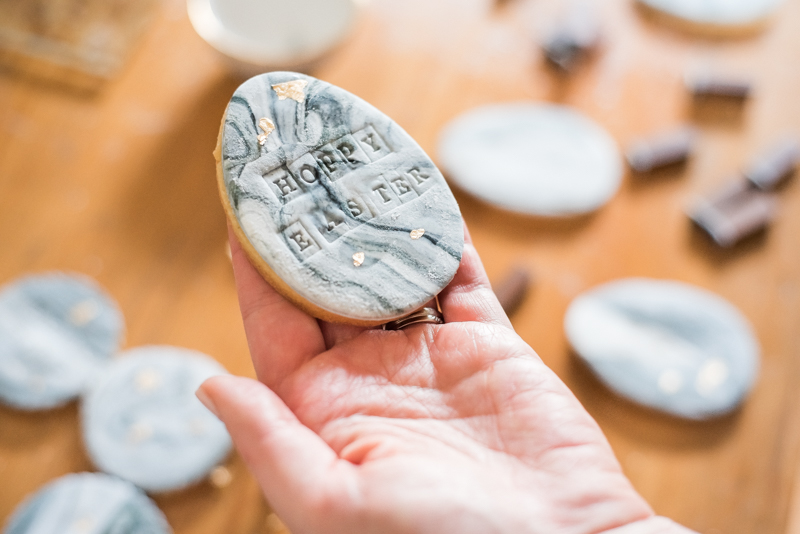
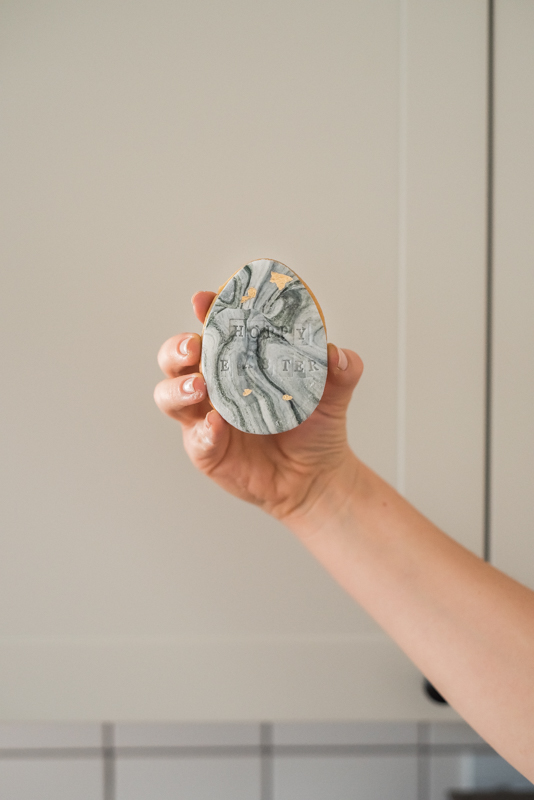
You can also use a tiny bit of water to add the edible gold leaf to your biscuits. Finally, use your stencil letters to add text (like ‘Hoppy Easter’) onto your biscuits.

And that’s that. You’ve made gorgeous marbled biscuits for your next special occasion.
Yolandi ♥
*Biscuit recipe slightly adapted from ‘Basic to Brilliance’ by Donna Hay.
** Images: Carolyn Gregorowski